


Views: 222 Author: Rebecca Publish Time: 2025-04-05 Origin: Site


Content Menu
● Why You Might Need to Disassemble Your Kettle
● Tools Needed for Disassembly
● Step-by-Step Guide to Disassemble Farberware Electric Kettle
>> 3. Detaching the Handle Cover
>> 4. Accessing Internal Components
>> 5. Cleaning Internal Components
>> 7. Reassembling Your Kettle
● Additional Tips for Maintenance
● FAQs
>> 1. What should I do if my kettle doesn't turn off automatically?
>> 2. How can I fix leaks at the base of my kettle?
>> 3. Can I remove the lid of my Farberware electric kettle?
>> 4. Why does my kettle produce an odor during use?
>> 5. Is it safe to repair electrical components myself?
Disassembling a Farberware electric kettle can be a useful skill for troubleshooting, cleaning, or repairing the appliance. Whether your kettle is malfunctioning or you simply want to clean its internal components, this guide will walk you through the process step by step. By following these instructions carefully, you can safely take apart your Farberware electric kettle and ensure it continues to function optimally.
Before diving into the process, it's important to understand why you might need to disassemble your kettle:
1. Troubleshooting Electrical Issues: If your kettle isn't heating properly or doesn't turn off automatically, disassembling it allows you to inspect the internal components for faults.
2. Cleaning and Maintenance: Over time, lime scale and residue can build up inside the kettle, affecting its performance. Disassembly lets you clean hard-to-reach areas thoroughly.
3. Repairing Damaged Parts: Components such as the heating element, thermostat, or seals may wear out over time. Disassembling the kettle allows you to replace these parts.
To safely take apart your Farberware electric kettle, gather the following tools:
- Three-winged screwdriver: Used for removing screws on the base and handle.
- Metal spudger: Helpful for prying open snap-fit parts without damaging them.
- Thin flathead screwdriver: Ideal for accessing small screws and tight spaces.
- Contact cleaner: Optional but useful for cleaning electrical contacts.
- Multimeter: Optional for testing electrical components like circuits and thermostats.
Before starting, ensure that you follow these safety guidelines:
- Unplug the Kettle: Disconnect the kettle from its power source to avoid electrical hazards.
- Allow Cooling Time: Ensure the kettle has cooled completely before handling it, especially if it was recently used.
- Work on a Stable Surface: Place the kettle on a flat and stable surface to prevent accidents during disassembly.
The base panel houses critical components such as wiring and connectors. Follow these steps to remove it:
1. Turn the kettle upside down and locate the screws on the bottom panel. These are often three-winged screws requiring a specialized screwdriver.
2. Unscrew all visible screws carefully and set them aside in a safe place to avoid losing them during reassembly.
3. Use a thin flathead screwdriver or metal spudger to gently pry open the base panel without damaging it.
Once removed, you'll have access to internal wiring and connectors.
The handle cover is usually attached with screws and snap-fit connections. Here's how to remove it:
1. Locate screws at both ends of the handle (top and bottom). Use a three-winged screwdriver to unscrew them one by one.
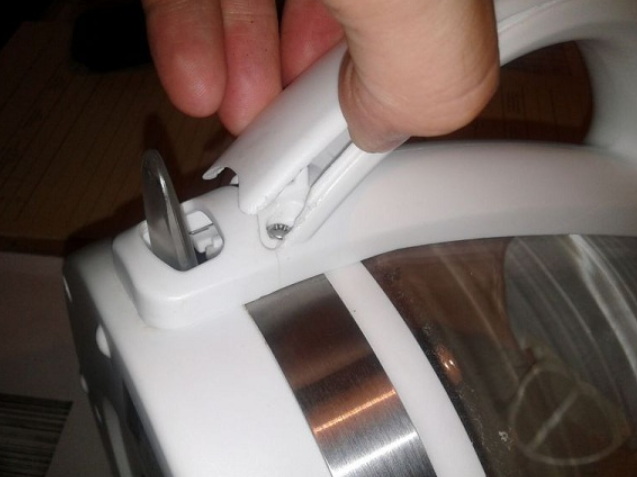
2. Once all screws are removed, use a metal spudger to release any snap-fit connections holding the handle cover in place. Be careful not to apply excessive force as this could damage plastic components.
Removing the handle cover exposes additional internal components like wiring leading to buttons or indicators.
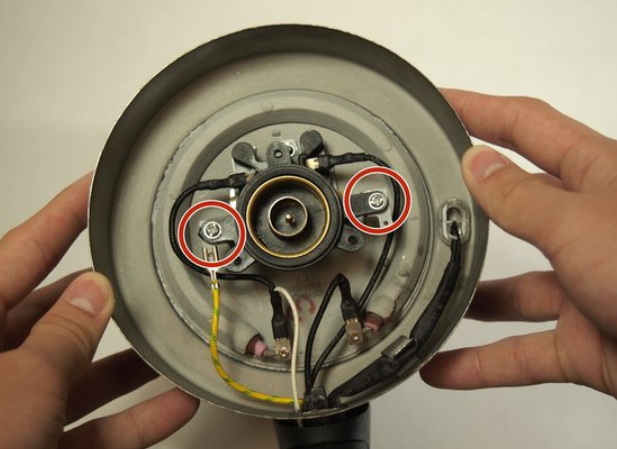
With both the base panel and handle cover removed, you can now access key internal components of the kettle:
1. Identify major parts such as:
- Heating Element: Responsible for boiling water efficiently; located at the bottom of the kettle body.
- Thermostat: Ensures automatic shut-off when water reaches boiling point; typically near the heating element.
- Bimetallic Plates: Regulate temperature changes; connected to the thermostat mechanism.
- Steam Channels: Direct steam toward sensors for automatic shut-off functionality.
2. Carefully disconnect wires attached to these components using pliers or by hand if they are easily removable.
3. If necessary, remove copper springs or other small parts that might block access during cleaning or repairs.
Once internal components are exposed, it's time to clean them thoroughly:
1. Use contact cleaner on electrical connections to remove dirt and oxidation buildup that could interfere with performance.
2. For lime scale buildup on metal parts like the heating element, use a descaling solution or vinegar mixed with water:
- Apply the solution directly onto affected areas.
- Scrub gently using a soft brush or cloth.
3. Wipe down all parts with a clean cloth after cleaning to ensure no residue remains.
While disassembled, inspect each component for signs of wear or damage:
- Check wiring for fraying or loose connections.
- Inspect seals around the base for cracks that could cause leaks.
- Examine bimetallic plates for warping or discoloration.
- Test electrical components like thermostats using a multimeter (optional).
Replace any damaged parts before reassembling the kettle.
Reassembly is essentially reversing the disassembly process:
1. Reattach all internal components securely in their original positions.
2. Replace copper springs or other small parts that were removed earlier.
3. Snap-fit handle covers back into place and secure them with screws.
4. Reattach the base panel and tighten all screws firmly.
Once reassembled, perform a quick functionality test by plugging in the kettle and boiling water.
To prolong your Farberware electric kettle's lifespan:
- Regularly descale your kettle using vinegar or commercial descaling solutions.
- Avoid overfilling past maximum capacity as this may damage internal components.
- Clean external surfaces with a damp cloth regularly to maintain appearance.
Disassembling your Farberware electric kettle is an essential skill that allows you to troubleshoot issues, clean internal components, and perform repairs when necessary. By following this guide step by step and adhering to safety precautions, you can keep your appliance functioning optimally while saving money on professional repairs.
Remember that while minor repairs can be done at home, complex electrical issues should always be handled by qualified professionals.
The issue is likely due to a faulty thermostat or steam channel blockage:
- Check if steam holes are clogged with residue.
- Replace damaged thermostats found at the bottom of the kettle case.
Leaks are often caused by worn-out seals or improper assembly:
- Inspect seals around the base for damage.
- Reapply silicone paste during reassembly to ensure tight sealing.
No, most Farberware lids are non-removable:
- Use a lid release button if available.
- Avoid forcing it open as it may damage hinges.
Odors may result from manufacturing residues or lime scale buildup:
- Boil fresh water twice before first use.
- Periodically descale with vinegar or descaling solution.
While minor repairs like cleaning contacts are safe, consult qualified personnel for complex electrical issues:
- Use a multimeter to test circuits.
- Avoid handling live wires without proper tools and knowledge.


