


Views: 222 Author: Rebecca Publish Time: 2025-02-05 Origin: Site


Content Menu
● Understanding Electric Kettles
● Why Paint an Electric Kettle?
● Materials Needed for Painting
● Steps to Paint an Electric Kettle
● Maintenance of Painted Kettles
● Design Ideas for Your Painted Kettle
● Common Mistakes to Avoid When Painting an Electric Kettle
>> Using Non-Heat Resistant Paints
● Troubleshooting Common Issues
● FAQ
>> 1. Is it safe to paint an electric kettle?
>> 2. What type of paint should I use?
>> 3. Can I use my painted kettle for boiling water?
>> 4. How do I clean my painted kettle?
>> 5. Can I remove paint from my kettle if I don't like it?
Painting an electric kettle can be a fun and creative way to personalize your kitchen. However, it requires careful consideration of materials and safety. This article will guide you through the process of painting an electric kettle, including necessary precautions, tips for successful painting, and maintenance advice. We will also explore various design ideas and provide a comprehensive FAQ section at the end.
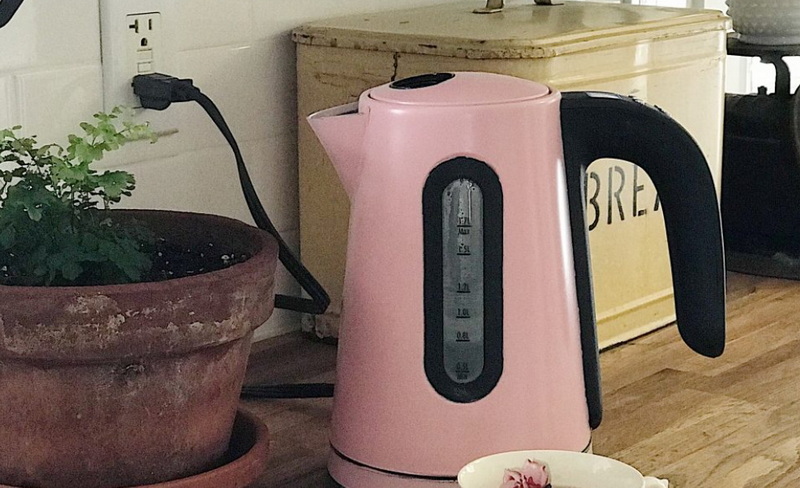
Electric kettles are popular appliances used for boiling water quickly. They come in various materials, including stainless steel, plastic, and glass. Each material has its unique properties that can affect the painting process.
- Stainless Steel: Durable but requires special paint to adhere properly.
- Plastic: Easier to paint but may not withstand high temperatures.
- Glass: Can be painted but requires specific types of paint and techniques.
People choose to paint their electric kettles for several reasons:
- Aesthetic Appeal: To match kitchen decor or add a pop of color.
- Personalization: To express individual style.
- Upcycling: To give an old kettle a new life.
Before starting your project, gather the following materials:
- Electric Kettle: Choose one that you want to repaint.
- Primer Spray Paint: Specifically designed for high-temperature applications.
- Acrylic Paint: For detailed designs (if hand painting).
- Painter's Tape: To mask areas you don't want to paint.
- Drop Cloths or Newspapers: To protect your work area.
- Sponge or Cloth: For cleaning the kettle before painting.
- Clear Sealant (optional): To protect the painted surface.
1. Clean the Kettle: Use mild dish detergent and a cloth to remove grease and dirt from the kettle's surface. This ensures better paint adhesion.
2. Disassemble if Possible: Remove any detachable parts like the lid or handle to make painting easier.
1. Tape Off Areas: Use painter's tape to cover any parts you do not want to paint, such as the spout or electrical components.
1. Apply Primer: In a well-ventilated area, spray an even coat of high-temperature primer over the kettle. Allow it to dry completely before applying paint.
1. Choose Your Paint: Select a heat-resistant spray paint or acrylic paint for hand painting.
2. Apply Paint: If using spray paint, hold the can about 6-12 inches away from the surface and spray in light, even coats. For hand painting, use fine brushes for details.
3. Multiple Coats: Depending on the color and type of paint, you may need two or more coats. Allow each coat to dry before applying the next one.
1. Seal the Paint (optional): Once everything is dry, consider applying a clear sealant for added protection against wear and tear.
2. Reassemble the Kettle: Once all parts are dry, carefully reattach any components you removed earlier.
When painting an electric kettle, safety should be your top priority:
- Ventilation: Ensure your workspace is well-ventilated to avoid inhaling fumes from paints.
- Protective Gear: Wear gloves and a mask to protect yourself from irritants.
- Avoid Heat Sources: Do not paint near open flames or heat sources as many paints are flammable.

To keep your painted kettle looking great:
- Hand Wash Only: Avoid submerging it in water; instead, wipe it down with a damp cloth.
- Avoid Abrasive Cleaners: Use non-abrasive cleaners to prevent scratching the paint.
Here are some creative ideas for designing your painted kettle:
Floral designs can bring a touch of nature into your kitchen. You can use stencils or freehand your designs using vibrant colors like reds, yellows, and greens. Consider using different shades of one color for a gradient effect that adds depth.
For a modern look, geometric patterns are an excellent choice. You can create triangles, circles, or stripes using painter's tape for clean lines. Experiment with contrasting colors like black and white or bright primary colors against neutral backgrounds.
Seasonal themes can also be fun! For instance:
- In autumn, consider leaves in warm oranges and browns.
- For winter holidays, snowflakes in white on a blue background could be charming.
If you're feeling particularly creative, consider painting inspirational quotes on your kettle. Use elegant fonts and contrasting colors so that they stand out beautifully against the kettle's surface.
For those who want to push their creativity further, consider mixed media techniques that incorporate decoupage or even fabric elements (though ensure they are heat-resistant). This could create unique textures and visuals that make your kettle truly one-of-a-kind.
While painting an electric kettle can be enjoyable, there are common pitfalls that you should avoid:
Skipping cleaning or not using primer can lead to poor adhesion of paint. Always ensure that surfaces are clean and primed appropriately before applying color.
Using regular acrylic paints without checking their heat resistance can lead to peeling or bubbling when the kettle is in use. Always select paints specifically designed for high temperatures.
Applying too much paint at once can cause drips and uneven surfaces. Instead, opt for multiple thin layers for a smoother finish.
Rushing through drying times between coats can result in smudging or incomplete curing of the paint. Patience is key!
If you encounter issues while painting your electric kettle, here are some troubleshooting tips:
If you notice peeling after drying:
- Ensure proper surface preparation next time.
- Use appropriate primer and heat-resistant paints.
If your coating appears uneven:
- Try applying thinner layers next time.
- Sand lightly between coats for smoother application.
If colors fade over time:
- Consider using a clear sealant after painting to protect against UV light exposure in kitchens.
Painting an electric kettle can be a rewarding DIY project that adds character to your kitchen. By following proper preparation steps and safety precautions, you can successfully transform an ordinary appliance into a personalized piece of art that reflects your style and creativity. Whether you choose floral patterns, geometric shapes, or themed designs, let your imagination run wild as you embark on this fun project!

Yes, it is safe if you use heat-resistant paints and follow proper safety precautions during the painting process.
Use high-temperature spray paints specifically designed for appliances or acrylic paints suitable for metal surfaces.
Yes, as long as you use appropriate heat-resistant paints and allow sufficient drying time after painting.
Wipe it down with a damp cloth instead of submerging it in water to maintain the paint finish.
Yes, you can remove paint using acetone or paint thinner, but this may damage the underlying material if not done carefully.
[1] https://www.hunker.com/13413033/how-to-change-the-color-of-a-kettle/
[2] https://fbinsure.com/painting-safety-tips-for-a-home-refresh/
[3] https://www.ultimatehandyman.co.uk/forum1/viewtopic.php?t=43488
[4] https://www.instructables.com/How-to-Decorate-Old-Kettle/
[5] https://www.truevalue.com/diy-projects/paint-and-stain/painting-safety/
[6] https://hydrangeafarmhouse.com/diy-kettle/
[7] https://www.yongkeng.com/top-precautions-for-electric-kettle-use.html
[8] https://www.youtube.com/watch?v=5vDf5iV8PxQ


